Link to Folder with Presentation PDF and PowerPoint -> https://drive.google.com/drive/folders/14hmk9rOgd4EPaNR6QatXRkf3GIkle2zX?usp=sharing

I will be covering a simple starting pipeline for creating hair using Maya's XGen plugin! I used my current Killer Klown project as my experiment for learning this tool.
Link to project in slide.
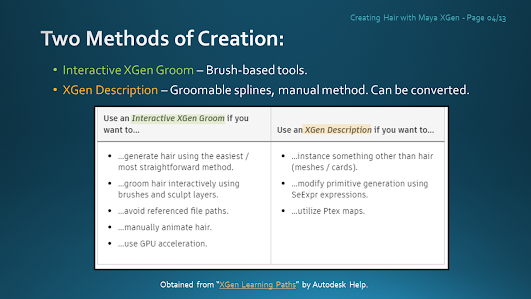
Autodesk has outlined two primary paths for using XGen - Interactive Grooms and XGen Descriptions. I spent some time researching both methods before deciding Interactive XGen Groom was the best for my project; the brush tools felt like the most efficient way for me to build the hair vs. manually placing splines and guides.
First, I sculpted a proxy of the head of the character in ZBrush. Next, I built a quick retopo in Maya (just enough geo to give me the majority of the head shape). I separated out the faces for the scalp mesh and used this as the base for the hair. A scalp mesh is apparently not required, but is something you should do if you plan on editing the face/rest of the geometry later. I also did a quick UV unwrap because UV's are important for hair.
Next, I generated Interactive Groom Splines from the Generate tab. This created a chia-pet-like effect on the scalp mesh, placing fuzz everywhere. From here, I changed some of the parameters (taper, width, starting length) to get it looking more hair-like. I also set up my program for working on the hair by enabling the "XGen - Interactive Groom" workspace, which allows you to see all of the major tools.
Next, I started grooming and shaping the hair using the tools found in the next slide! On the right is my result after combing/cutting/lengthening/smoothing/noising.
Modifiers affect the hair globally. Though the difference may look subtle between my before and after shots, you may notice that the hair is much more nicely clumped/smoothed together and looking overall more organized like realistic fake hair.
I mostly used the tutorial linked below to help me with attempting to render the hair in Arnold. At first, the hair was appearing as pink cards - after adding aiStandardHard and adjusting parameters, all rendered correctly! I didn't like the look of the very basic Klown in Arnold, so I threw on a quick base color texture for the shot.
For this last part of the demonstration, I used the tutorial linked below to help me with converting the hair to geometry cards. This is what should be done if the hair is intended to be used in a game.
First, I added modifiers for guides and linear wire. After generating the guides (the orange tubes), I had to clean them up by removing pieces from where they didn't belong (the tubes were generated all over the scalp mesh at first).
Next, I used the width brush to widen the tubes into what looked like a decent card size (and applied the flood tool to apply the effect all over the hair).
Next, I used the Convert Interactive Groom to Polygons tool from the Generate tab to convert the tubes to real polygon cards. The result may look messy, but can be cleaned up. For the purpose of this test demo, I moved on to the final step of applying a shader. The one in the final shot is a default hair shader from within Maya.
---
That wraps up my first exploration of Maya XGen! It was not as tricky as I expected, but there is still a lot to learn. I hope this information may help someone else!


