Monday, July 25, 2022

Portfolio 3 - Week 2 - Shorty the Killer Klown

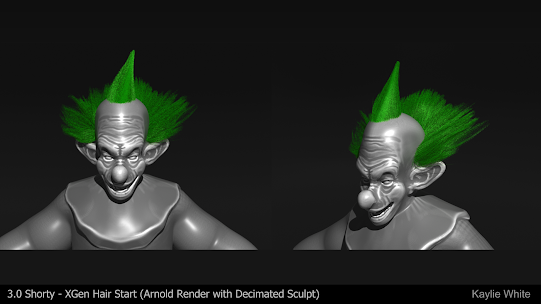
This week, I mostly focused on sculpting the body and getting back into learning about ZBrush Dynamics and cloth simulations! I've only used the tool once before and really liked it so wanted to see if it could handle this guy's suit. 

To get the wrinkles, I created polyloops on the lowest subdivision level where the stitching would be, masked out these areas, and applied the inflate, deflate, and contract simulations to get a level of detail that I felt matched the references. What I got isn't totally perfect, but after a lot of trial and error (there were many different iterations) I definitely feel like I have a better understanding of how to approach more cloth-y type of sculpts in the future!

Because I'm working with subdivision levels, the game res geo shouldn't be too much work to complete other than lowering density (it's sitting pretty high at around 108k at the lowest level, much of that geometry being in the suit which may need to be retopologized by hand) and connecting gaps between the neck and collar, cuffs and glove, etc. I'm excited to finish this up!

Remaining Schedule:

Week 3 (Tuesday) - Finish cleaning up geometry and hair, UV maps, materials.

Week 3 Final (Thursday) - Final clean-up and final display.


Wednesday, July 20, 2022

Common Art - Summer Sprint 5

 - Rearranged Victor Cyberstein's UV maps into 5 sets: Face, Inner Eye, Outer Eye, Hair, Body. Why: To get better resolution on all pieces and follow more of a standard character material pipeline.


- Re-textured Victor Cyberstein

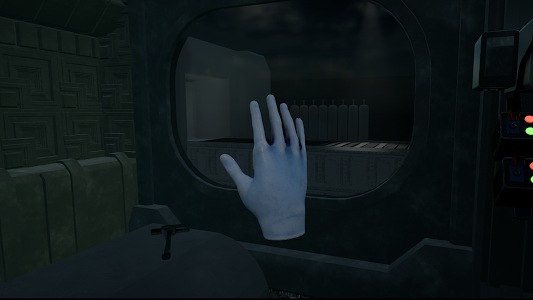
- Updated player hands texture (added a few wrinkles and lightened color because the blue was too dark/high contrast in VR). Added same gloves material to Victor.


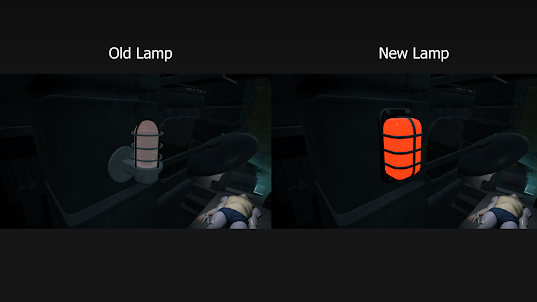
- Re-modeled and textured wall light. Why: Old model did not fit sci-fi theme. 


Plan for final delivery: Finish evil head texture and assist in updating any remaining environment texture work.

Monday, July 18, 2022

Research Project - Maya XGen

Link to Folder with Presentation PDF and PowerPoint -> https://drive.google.com/drive/folders/14hmk9rOgd4EPaNR6QatXRkf3GIkle2zX?usp=sharing


I will be covering a simple starting pipeline for creating hair using Maya's XGen plugin! I used my current Killer Klown project as my experiment for learning this tool.


Link to project in slide.


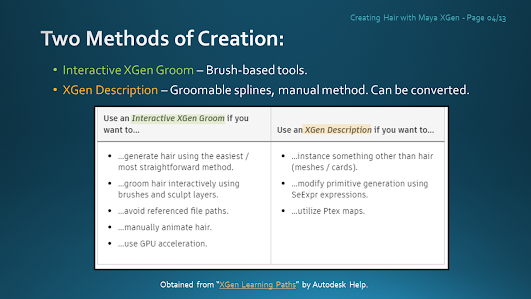
Autodesk has outlined two primary paths for using XGen - Interactive Grooms and XGen Descriptions. I spent some time researching both methods before deciding Interactive XGen Groom was the best for my project; the brush tools felt like the most efficient way for me to build the hair vs. manually placing splines and guides.


First, I sculpted a proxy of the head of the character in ZBrush. Next, I built a quick retopo in Maya (just enough geo to give me the majority of the head shape). I separated out the faces for the scalp mesh and used this as the base for the hair. A scalp mesh is apparently not required, but is something you should do if you plan on editing the face/rest of the geometry later. I also did a quick UV unwrap because UV's are important for hair.


Next, I generated Interactive Groom Splines from the Generate tab. This created a chia-pet-like effect on the scalp mesh, placing fuzz everywhere. From here, I changed some of the parameters (taper, width, starting length) to get it looking more hair-like. I also set up my program for working on the hair by enabling the "XGen - Interactive Groom" workspace, which allows you to see all of the major tools.


Next, I started grooming and shaping the hair using the tools found in the next slide! On the right is my result after combing/cutting/lengthening/smoothing/noising.


Modifiers affect the hair globally. Though the difference may look subtle between my before and after shots, you may notice that the hair is much more nicely clumped/smoothed together and looking overall more organized like realistic fake hair.


I mostly used the tutorial linked below to help me with attempting to render the hair in Arnold. At first, the hair was appearing as pink cards - after adding aiStandardHard and adjusting parameters, all rendered correctly! I didn't like the look of the very basic Klown in Arnold, so I threw on a quick base color texture for the shot.


For this last part of the demonstration, I used the tutorial linked below to help me with converting the hair to geometry cards. This is what should be done if the hair is intended to be used in a game.

First, I added modifiers for guides and linear wire. After generating the guides (the orange tubes), I had to clean them up by removing pieces from where they didn't belong (the tubes were generated all over the scalp mesh at first). 


Next, I used the width brush to widen the tubes into what looked like a decent card size (and applied the flood tool to apply the effect all over the hair). 

Next, I used the Convert Interactive Groom to Polygons tool from the Generate tab to convert the tubes to real polygon cards. The result may look messy, but can be cleaned up. For the purpose of this test demo, I moved on to the final step of applying a shader. The one in the final shot is a default hair shader from within Maya.


---

That wraps up my first exploration of Maya XGen! It was not as tricky as I expected, but there is still a lot to learn. I hope this information may help someone else!

Portfolio 3 - Week 1 - Short Proxy/High Resolution Sculpt Start

Schedule:

Wk 1 - Proxy sculpt, hair start.

Wk 2 - Sculpt finish, hair finish.

Wk 3 - Game res, UV's

Wk 4 - Materials, rig, final display.

The following photos are from Halloween Horror Nights at Universal Orlando in 2018 and are not my own! Images collected from google and HD youtube videos.

Tuesday, July 12, 2022

Portfolio 3 - References

For this project, I plan to take on two challenges - real-life photo references (as opposed to a concept art illustration) and hair using Maya XGen! This is Shorty from Killer Klowns from Outer Space and these photos were taken at Halloween Horror Nights 2018.

The style goal will be stylized realistic to align more with my portfolio. I really love working with horror subjects but haven't in a while due to working on expanding my range as an artist (art with wider applicability) so I'm excited to get back into something horror-related (rounding out my portfolio project subjects as sci-fi, medieval fantasy, and spooky)!

Schedule:
Wk 1 - Proxy sculpt, hair start.
Wk 2 - Sculpt finish, hair finish.
Wk 3 - Game res, UV's
Wk 4 - Materials, rig, final display.


Monday, July 11, 2022

Portfolio 2 Week 4 - Kraffa / Bird Guy

Need to finish bird geo (75% finished with quad drawn retopo, not what is shown here), finish UV's, finish materials, and rig and pose the character. I over-scoped what I would be able to accomplish this week but I will definitely continue working on this piece! (I modeled the swords but scrapped them for this week because I didn't get to the rig). If you notice a few things look Z-Remeshed (the mug, the bird), they are just placeholders until I can finish going over those pieces by hand.

Reference by Liang Tang. Artstation Link: https://www.artstation.com/artwork/9eYe1W

Wednesday, July 6, 2022

Common Art - Summer Sprint 4

- Victor sculpt fix (hands + face (using base mesh provided by Nick Z) + hair polish + jacket polish + glasses redo + added a strap to back of mask).

- Victor game res (24K).

- Victor UV map.

The man now has real hands (and eyes)!

* Running into very weird errors with bake in substance painter where the imported UV map is not matching what is shown in Maya. Have been looking for solutions but may need further help to solve. This has stopped me from being able to get Victor into the engine this week but he will definitely be ready to go for the final sprint (all major work is complete, just need to solve error).

Monday, July 4, 2022

Portfolio 2 - Week 3 - Kraffa / Bird Guy

What's Left:

* Sculpt: Need to continue work on face, hair, and accessories (scarf, mug, swords, bird).

Week 4 - UV's, materials, Final lighting/display.

The main focus of this week was getting him back into a T-pose and then finishing as many details as possible with the time I was able to invest. Once again a lot of proportion work was needed but I think I've made good progress on clean up and getting this in a better position for the upcoming final week; I'm looking forward to finally getting back to the birds and the swords and don't think they will pose too much of a challenge in addition to finishing up my game res geo + UV's + and materials (will keep it relatively simple like the concept). Humanoids have been a little out of my comfort zone but I feel more confident every week that I continue to practice and understand them better!


Status Update

Hi all! This blog will be sparsely updated going forward as my time at FIEA draws to a close. Thank you to my classmates (especially the 3D ...